


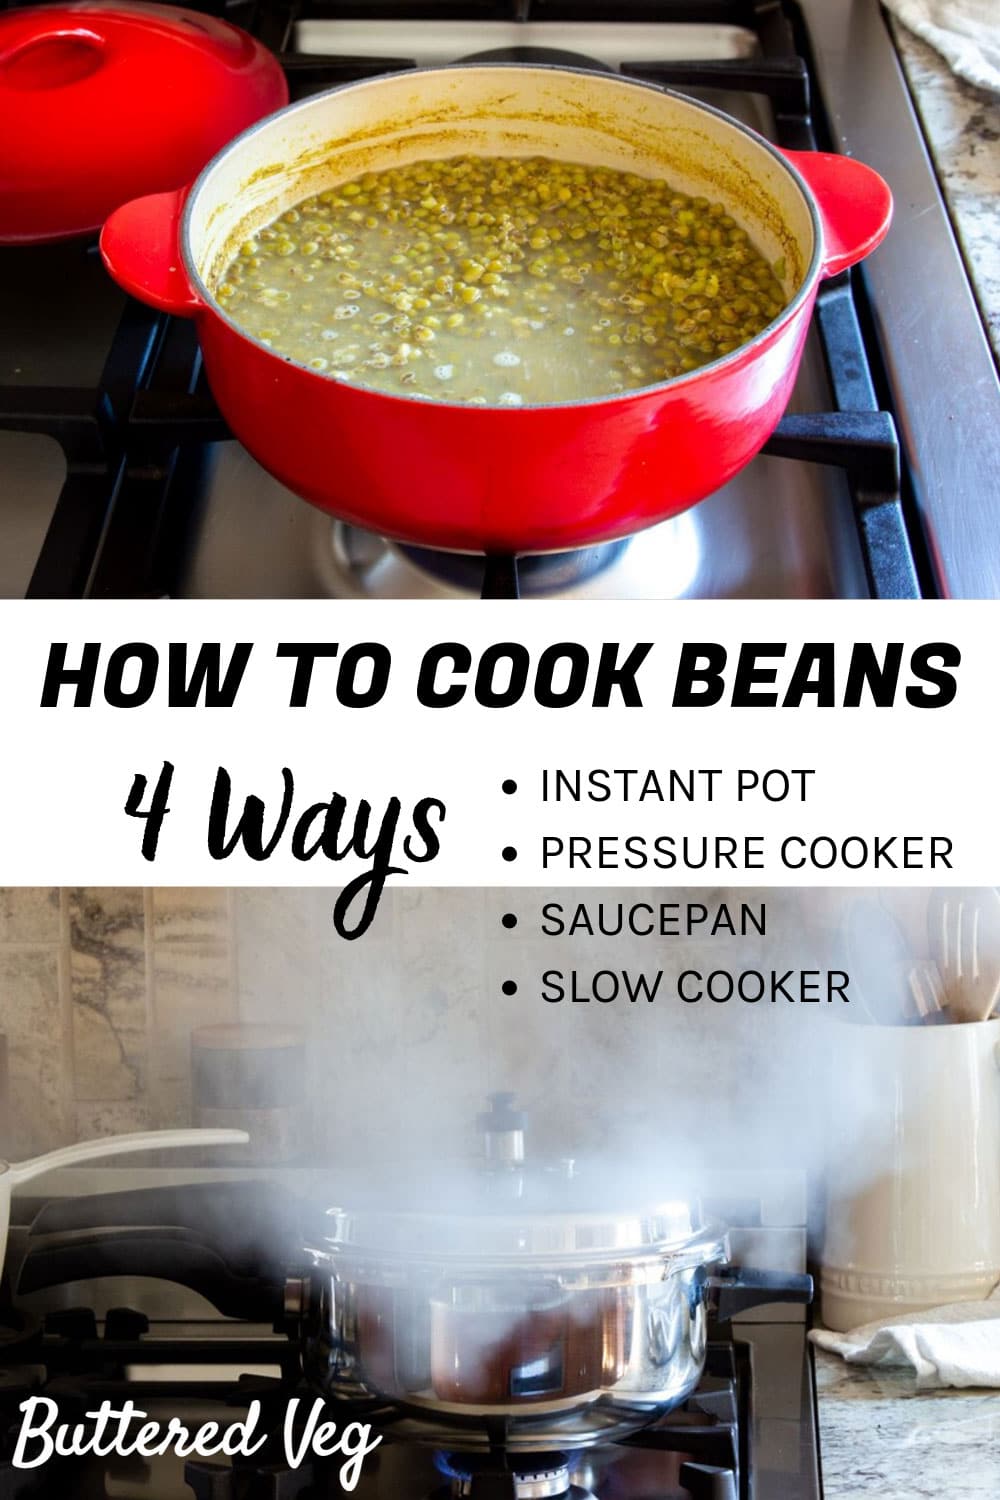
Have you decided to cook up a pot of beans, lentils, or peas, but aren’t sure how to go about it?
In this post, I will show you exactly how to cook soft, beautiful beans from scratch using your choice of four different methods:
1. Saucepan Method
2. Pressure Cooker Method
3. Instant Pot Method
4. Slow Cooker Method
All four methods start with soaking your beans, so we'll cover it first. There are even three quick soak methods if you are short on time.
You will also find cooking time reference charts for various types of beans, lentils, and peas, including Indian dal varieties.
At the end, there is a section with storage and reheating tips so that you can easily enjoy healthy beans from scratch any day of the week.
Click on any section in this table to contents to skip to what you need, or scroll down and read it all.
- How Do I Soak Beans?
- In A Rush? 3 Ways To Soak Beans Quickly
- How Do I Cook Beans In A Saucepan?
- 10 Steps To Cook Beans In A Pressure Cooker Or Instant Pot
- Cooking Times: Pressure Cooked Beans (Stovetop/Jiggle Top)
- Cooking Times: Pressure Cooked Beans (Instant Pot)
- How Do I Cook Beans In A Slow Cooker?
- Bean Storage And Reheating Tips
- BEAN RECIPES YOU MAY ENJOY
How Do I Soak Beans?
Why Soak Beans Before Cooking?
Soaking your beans serves three important purposes.
- It reduces cooking times considerably.
- It improves the texture of the beans, so that they remain intact while cooking, yet silky-smooth when you bite into them.
- Water soluble gas-producing sugars that are the culprits of flatulence are removed during the soaking process. Always discard the soaking water.
How To Soak Beans
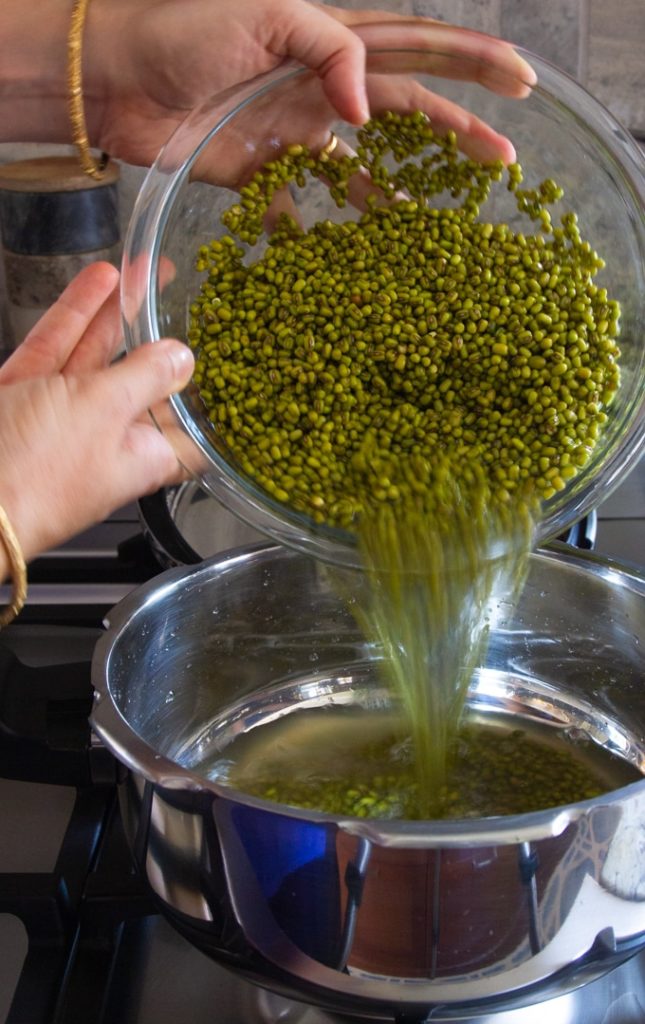
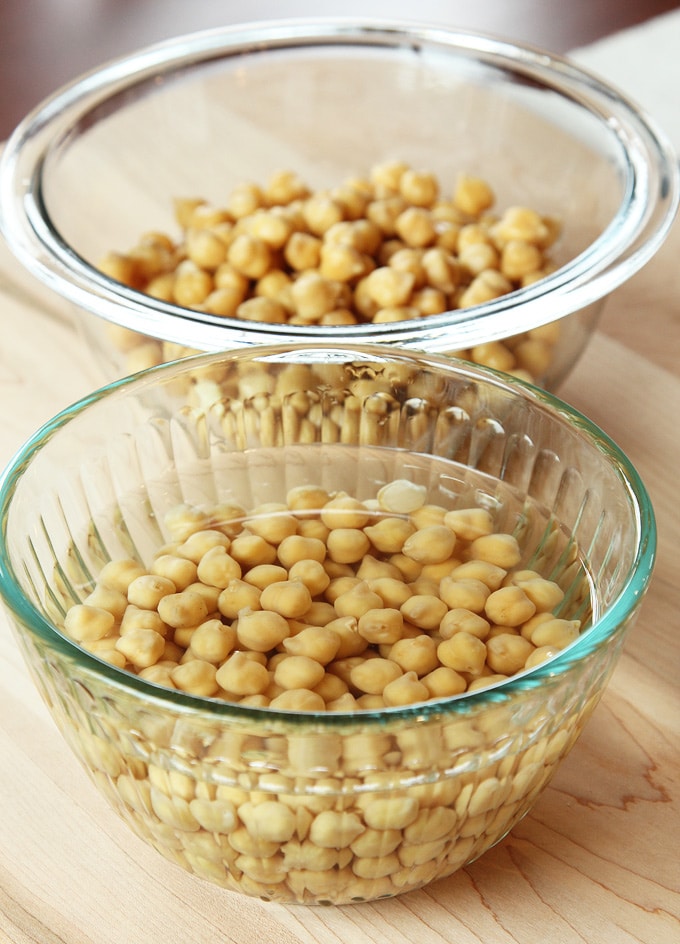
All beans, lentils, and dry peas benefit from soaking. I soak everything with the exception of red lentils, which I rinse.
To soak, place the beans in a bowl that can accommodate at least three times the quantity of dried beans.
Cover with at least two inches of cold water.
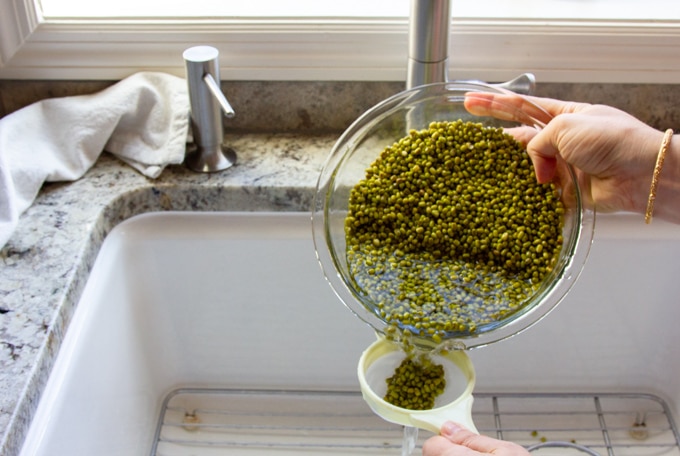
After the desired amount of soaking time, remove the soaking water and rinse thoroughly. Then always use fresh cold water to cook with.
Consider using my rinsing trick to save time.
Rather than dirtying a large colander, or simply pouring carefully and risk loosing some of your beans down the drain, try pouring the water out through a small sieve to catch any beans that might fall into the sink.
Should I Add Salt To The Soaking Water?
I recommend adding a pinch of salt to your soaking water. This is somewhat controversial, since traditional wisdom always recommended not salting water.
However, salting the water has always worked for me, and Cook’s Illustrated and Serious Eats both recommend it. Serious Eats recommends a proportion of 1 tablespoon of salt to a quart of water.
Salting the water adds flavor and helps the beans absorb more water. Salt in soaking water also helps the beans keep their shape while cooking.
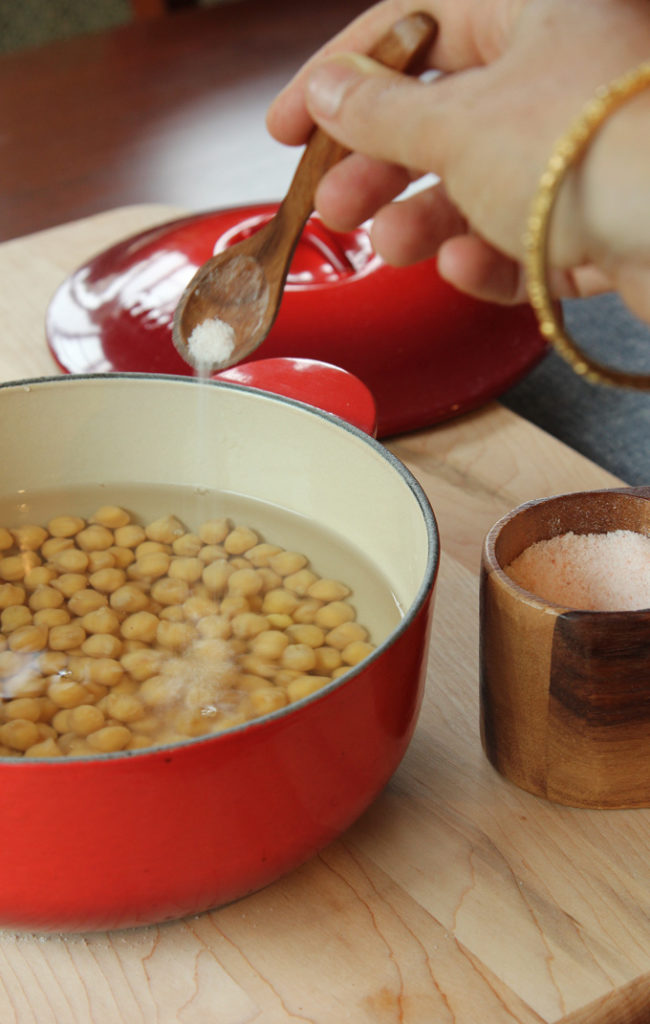
Not adding salt will cause the beans to break down and get mushier during the cooking process.
If this is your preference, add salt only when the beans are almost fully cooked.
You will often see instructions in recipes to pick over the beans for stones or debris. With improvements in manufacturing, this is no longer necessary.
How Long Should I Soak My Beans?
You can never go wrong with soaking beans overnight, or in the morning for that night’s dinner.
Soaking longer than the recommended minimal soaking times isn't a problem either.
If you are soaking longer than a day, keep the beans in the fridge. This is fine for 2 to 3 days.
Large beans: 6-8 hours, or overnight (best)
Examples include chickpeas, lima, kidney, and pinto.
Medium beans: 4–6 hours
Examples include black beans, mung beans, split peas, and adzuki beans.
Lentils: 2–4 hours
Brown lentils, green lentils, golden lentils, red lentils, and split lentils.
*You can cook beans without soaking, especially lentils, but it will increase the cooking time substantially, and the end result will not be as pleasing.
In A Rush? 3 Ways To Soak Beans Quickly
What if you really want beans for dinner, but you forgot to soak?
You can still cook unsoaked beans, but it will take much longer, and the results will not be as good. Therefore, some soaking time is always better than none.
Here are three solutions to help you get a soak done in less than one or two hours.
Don’t forget to add a pinch of salt to your quick soak!
1. Fastest and easiest quick soak method
Pour boiling water over the beans and let them soak for 20 minutes, or as long as possible. Drain the cooking water, rinse well, and proceed with your recipe.
2. Saucepan quick soak method
Place beans in a saucepan and cover them three times the water. Bring to a boil for 2 to 10 minutes, depending on the size of the bean.
Turn off the heat and let the beans sit in the hot water for 20 minutes, or as long as possible.
Drain the soaking water, rinse well, and proceed with your recipe using fresh cold water.
3. Pressure cooker quick soak method
Put the beans in a pressure cooker and cover them with three times the water. Close the lid, bring the cooker up to high pressure, and then turn off the heat.
Let the pressure come down naturally for 15 minutes.
If you are using a large size bean, like a kidney bean, you can cook for a few minutes at high pressure before turning off the heat.
Drain the soaking water, rinse well, and proceed with your recipe using fresh cold water.
How Many Beans Should I Cook?
On average, 1 cup of beans will yield 2–3 cups of cooked beans. This will feed about 4 people.
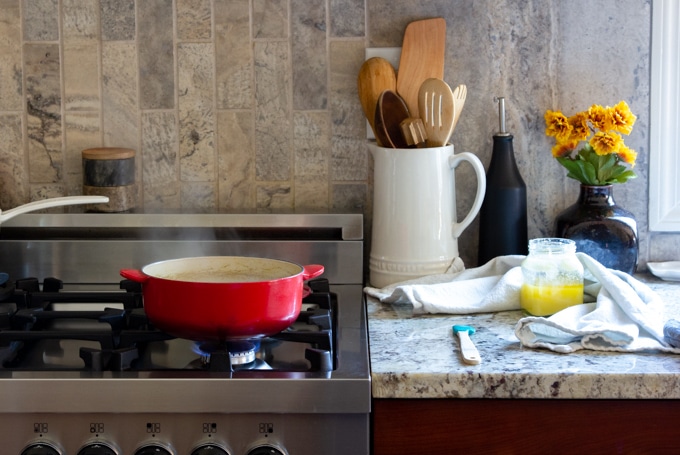
How Do I Cook Beans In A Saucepan?
To cook beans in a saucepan requires a lot of time and patience, and cooking times can vary widely based on the age of the beans and how dried out they are. (Beans don’t really go bad, but they do dry out.)
Some of the large beans, such as chickpeas, could take up to 3 hours, while certain lentils can cook in as little as 15 minutes.
The good news is that beans require little attention while cooking. They don’t tend to stick until the very end, and so frequent stirring isn’t necessary.
The main thing you need to watch out for is the beans running out of water. The general rule is to keep the beans covered with water at all times.

For most beans it is safe to start with 3 times the quantity of water as the beans. Remember to add a pinch of salt to the cooking water.
Simmer on low so that the skins stay together and the beans remain their whole form.
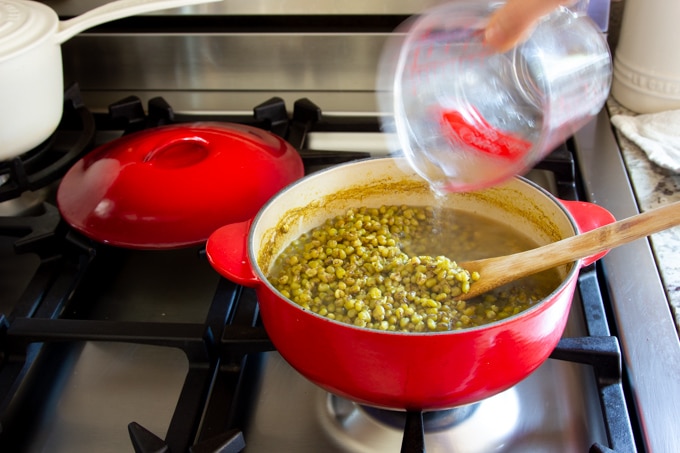
To make cooking beans a more pleasurable experience for the senses, consider seasoning the cooking water.
Common seasonings include smashed garlic cloves, a couple bay leaves, black pepper, basil, chili power or flakes, cumin, parsley, thyme, onions, scallions.
If you add seasoning at the beginning, the flavors will more fully incorporate into the dish and it will probably taste better in the end, but careful not to add too much at the beginning, because the flavors will intensify over time, and as the liquid reduces.
Some cooks advise only adding seasoning around 30 minutes before the beans are done.
If you are more comfortable this way, then this is also a good option.
Or maybe try adding at both stages.
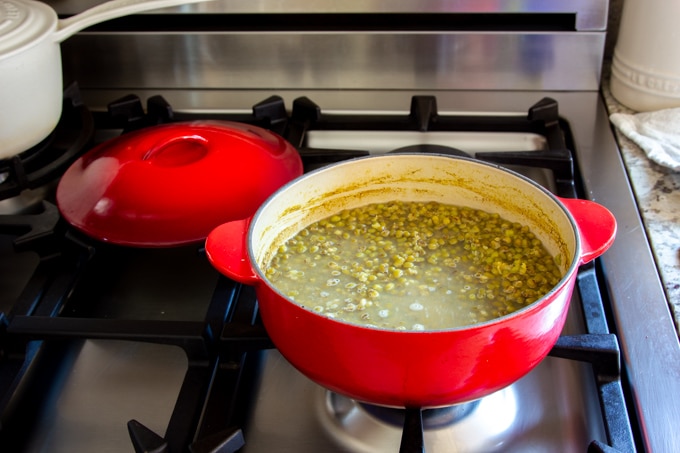
When the beans are cooked, they will be fully tender, and the liquid will have thickened slightly into a broth.
Carefully monitor the water levels at the end. Do you want more or less broth? Some recipes require broth. Others just want the beans.
If your recipe does not require the broth, consider retaining it for a minestrone or mushroom soup, or simply discard it.
Use the chart below as a reference. Cooking times will vary depending on the age and moisture content of the beans.
Cooking Times: Saucepan Beans
| BEAN TYPE | UNSOAKED | SOAKED |
|---|---|---|
| Black Beans | not recommended | 1–2 hours |
| Kidney Beans | 1 ½ to 2 hours | 1 hour |
| Chickpeas (Kabuli Chana) | no recommended | 2.5 hours |
| Pinto Beans | 3 hours | 2 hours |
| Adzuki Beans | 1 hour | 40 minutes |
| Brown, Green, or Red Lentils | 1 hour | 30 minutes |
| Mung Beans (Whole Mung Dal) | 40 minutes | 50 minutes |
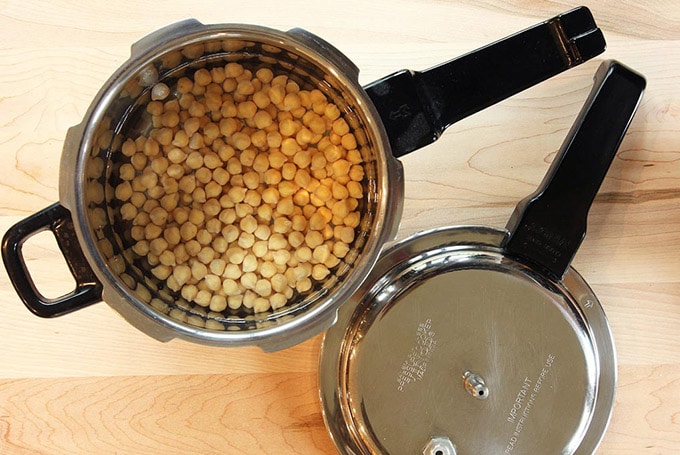
10 Steps To Cook Beans In A Pressure Cooker Or Instant Pot
Cooking beans in a pressure cooker saves a huge amount of time and energy.

For example, chickpeas that take around 2 ½ hours to cook in a saucepan, will cook in 9–14 minutes in a pressure cooker.
When you use a pressure cooker, you can cook beans from scratch and still have a healthy dinner on the table in under an hour. Amazing right?
Below, I am going to teach you 9 Easy Steps you can follow to achieve soft, perfectly cooked beans using a pressure cooker or Instant Pot.
1. Make sure your pressure cooker is the right size
Pressure cookers come in different sizes from 1 quart on up.
To cook 1 cup of dry beans, at least a 3-quart cooker is needed.
For 2 cups of dry beans, you’ll need a 5-quart cooker.
For 3 cups of dry beans, you’ll need an 8-quart cooker.
* As a general rule, 1 cup of dried beans will yield around 2 cups of cooked beans.
2. Add the beans and water
Do not fill your pressure cooker more than half full of beans and liquid.This ensures that there is enough space for the beans to foam up while cooking, which they will.
It is a good idea to always add a teaspoon of oil into the pot before closing the lid. The oil prevents excessive foaming, which in rare cases can clog the steam vent in a pressure cooker.
I also recommend cooking with a pinch of salt.
Other seasonings, such as garlic, bay leaves, chilis, onions, or turmeric, can also be added at this stage.
3. Make sure you use enough water
Make sure you use enough water, because if you run out of water while cooking under pressure, it is a safety risk.
* If you really run out of water, you risk overheating the cooker. All cookers have safety features that will prevent a serious accident like an explosion from occurring, but I am sure you don’t want to test this in your kitchen.
Note that this safety risk applies only to the stovetop cookers. The Instant Pot will simply shut off if it senses there is low water.
Here’s how to ensure you use enough water:
Even after soaking, beans still require about two times the volume of beans to liquid. This is usually water or stock.
If you didn’t soak, remember that most beans will at least double in yield from dry, while some peas can actually triple in size. So if you did not soak, you should add three to four times the amount of water to the cooker.
A small amount of water is released in the form of steam during the cooking process as well.
3. Do two tiny safety checks
1. Check that the steam vent is clear
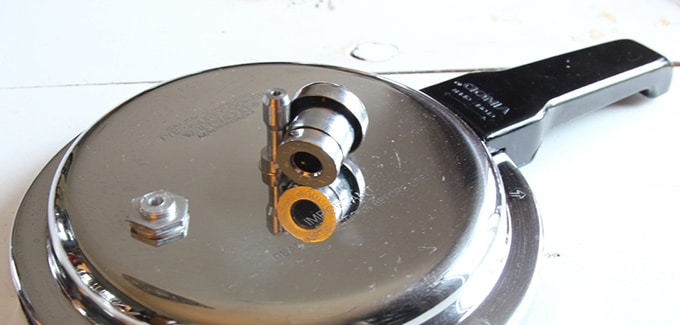
The lid of your pressure cooker or Instant Pot has a steam vent sticking out of it. You want to make sure that this steam vent is not clogged with anything. You should be able to see daylight through the vent. Simply lift up the lid and look through it.
To check the steam vent on the Instant Pot you will need to remove the metal cover on the interior of the lid to expose the vent.
2. Check the rubber gasket
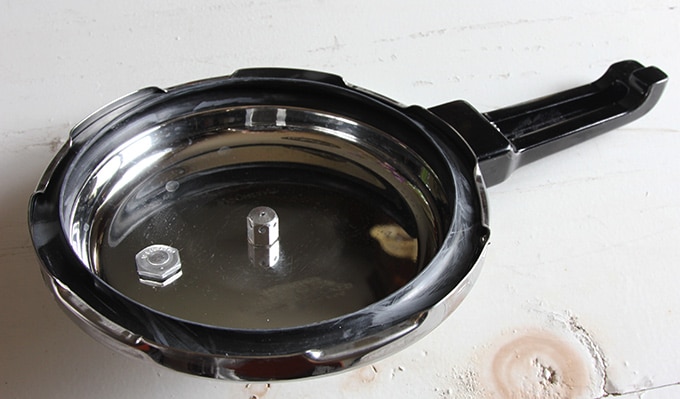
The inner edge of the lid of your pressure cooker or Instant Pot has a rubber seal, which is known as a gasket. Make sure that it is clean and in place before locking on your lid.
Note that over time, the rubber of the gasket will harden and no longer keep its seal as before. You will know because steam will begin to escape from the sides of your cooker. These gaskets are easily replaced.
That’s it. You are ready to start cooking!
RECOMMENDED FOR YOU:
Pressure Cooking Guide: How To Use A Pressure Cooker Safely —READ MORE
5. Decide how long to cook under pressure
Beans are cooked under high (or low) pressure for a set number of minutes determined by your recipe, or the charts below.
It is important to know that bean cooking is not an exact science.
Factors, such as the length of soaking time, not soaking, age of the beans, quantity, strength of the pressure, and so on, will affect how soft and intact your beans get.
The thing about cooking in a pressure cooker is that you will not know the result until the very end.
Your beans may be too soft, too hard, or hopefully just right.
If your beans are too soft, make a note of it, and reduce the number of minutes under pressure the next time you cook.
If your beans are too hard, you have two options:
The first is to put the lid back on and bring the beans back up to high pressure for 1 or more minutes to cook them further.
The second option is to finish cooking the beans on the stovetop, where you can carefully monitor their doneness as they simmer.
A caution if you choose this second option. It will not happen as fast as you think. It could take another hour.
Below are two reference for bean cooking times.
The first chart refers to stovetop pressure cookers, such as the jiggle top style of cookers.
The second is for the Instant Pot.
As a general rule, anything cooked in an Instant Pot will take longer than a stovetop pressure cooker, because the Instant Pot is regulated at a slightly lower temperature, even on high.
Cooking Times: Pressure Cooked Beans (Stovetop/Jiggle Top)
| BEAN TYPE | SOAKED (NATURAL RELEASE) | UNSOAKED (QUICK RELEASE) |
|---|---|---|
| Adzuki Beans | 3 minutes | 20 minutes |
| Black Beans | 6 minutes | 22 minutes |
| Chickpeas (Kabuli Chana) | 14 minutes | 40 minutes |
| Lentils (Brown or Green) | 3 minutes | 10 minutes |
| Lentils (French) | 4 minutes | 12 minutes |
| Red Lentils | not recommended | 4 minutes |
| Mung Beans (Whole Mung Dal) | 6 minutes | 12 minutes |
| Split Peas (Green or Yellow) | 3 minutes | 10 minutes |
| Pigeon Peas (Toor Dal) | 5 minutes | 25 minutes |
| Pinto Beans | 3 minutes | 25 minutes |
| Red Kidney Beans | 10 minutes | 25 minutes |
Cooking Times: Pressure Cooked Beans (Instant Pot)
| BEAN TYPE | SOAKED (NATURAL RELEASE) | UNSOAKED (QUICK RELEASE) |
|---|---|---|
| Adzuki Beans | 6 minutes | 20 minutes |
| Black Beans | 8 minutes | 25 minutes |
| Chickpeas (Kabuli Chana) | 30 minutes | 40 minutes |
| Lentils (Green or Brown) | 15 minutes | 20 minutes |
| Red Lentils | not recommended | 8 minutes (low pressure) |
| Mung Beans (Whole Mung Dal) | 30 minutes | 35 minutes |
| Black-Eyed Peas | 5 minutes (low pressure) | 8 minutes (low pressure) |
| Pigeon Peas (Toor Dal) | 12 minutes | 25 minutes |
| Pinto Beans | 9 minutes | 30 minutes |
| Red Kidney Beans | 30 minutes | 45 minutes |
What does it mean to cook on high, versus low pressure?
A jiggle top cooker allows for only one cook setting, which is high pressure.
With an Instant Pot you can choose to cook under high or low pressure settings.
Low pressure works best for delicate lentils and peas that don’t need as much heat to cook.
If you wish to change the pressure from high to low on an Instant Pot, simply press the Pressure button to toggle the indicator.
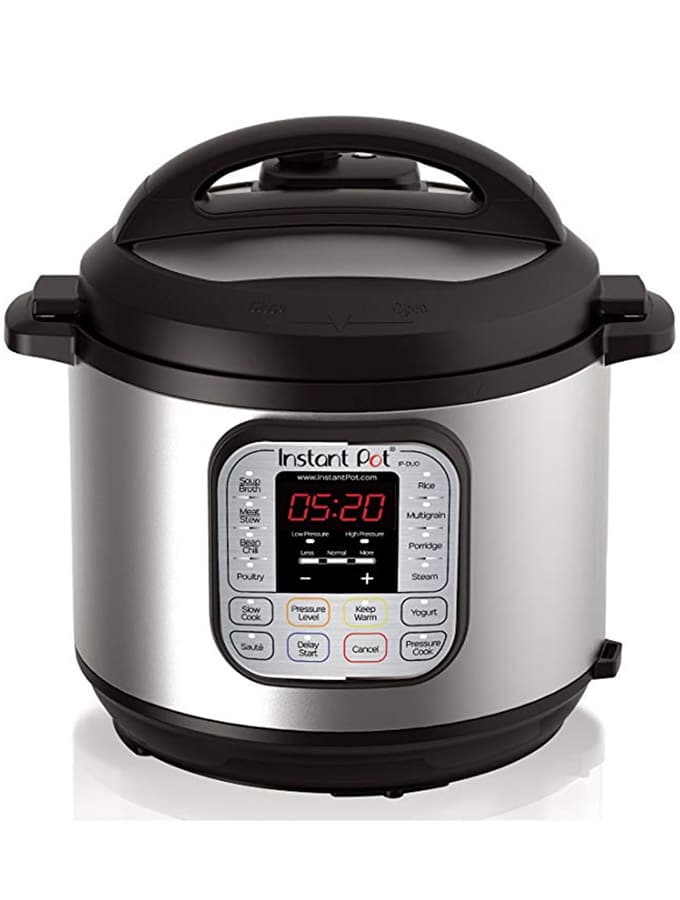
How do I set the number of minutes on an Instant Pot?
With an Instant Pot, most people use the Manual cook settings.
When you press the Manual button, the Instant Pot will automatically show 30 minutes of cooking time. If needed, adjust this up or down using the (+) and (-) buttons.
6. Cook your beans
Plan on 5-20 minutes for the cooker to reach high pressure.
The amount of time it takes depends on the intensity of the heat, and the volume of beans and liquid in the cooker.
The cooking time starts only after the pressure cooker has reached high (or low) pressure.
Stovetop Pressure Cooker (Jiggle Top)
Attach the lid and turn the heat up to high.
Wait for steam to begin escaping from the steam vent on the top of the cooker. (This is another way to check that it’s working and clear.)
Insert the pressure regulator and wait for the first whistle. A whistle is a sound a jiggle top pressure cooker makes when it releases steam.

At this point, turn down the heat slightly and set a kitchen timer for the desired number of minutes of cooking time.
After the desired amount of cooking time, turn off the heat.
Instant Pot
The lid of the Instant Pot only fits on one way. After you place it on, turn it clockwise to lock it in position.
The Instant Pot will automatically take care of monitoring the heat as it builds pressure.
You will know that it has reached high pressure when a red (sometimes silver, depending on the model) valve on the top of the lid pops up.
You will also start to see the number of minutes counting down as it cooks.
When it is done, it will beep three times.
7. Wait for the pressure to reduce naturally
After turning off the heat, allow 10–15 minutes for the pressure to come down naturally before opening the lid.
During this time, your beans will continue cooking. This is good for the beans, as the gentle, pressurized heat softens the beans.
There are other instances where you may need to use a quick release method to open the lid faster.
This would be where you believe you have cooked under pressure for too long, or if you are cooking something other than beans that require a more exact cooking time.
See the next section for details on opening the lid safely.
8. Open the lid safely using natural release
Even after waiting 10-15 minutes, you must ALWAYS check for residual pressure before attempting to open the lid.
Never try to force a lid open. It should open easily. Difficulty opening a lid indicates there is likely residual pressure inside the pot.
Stovetop Pressure Cooker (Jiggle Top)
With a stovetop pressure cooker, use a long spoon to jar the pressure regulator to the side. Do not every try to use your bare hands as hot steam burns.
If steam releases from the pressure regulator, the pot is releasing its residual pressure. Continue to hold it ajar until all the steam is released. It is now safe to open the lid.
Remember, if there is resistance while opening, stop and check again for residual pressure.
Instant Pot
With an Instant Pot, the red (or silver) float valve on the pot will pop down when all the pressure is gone from the cooker and it is safe to open the lid.
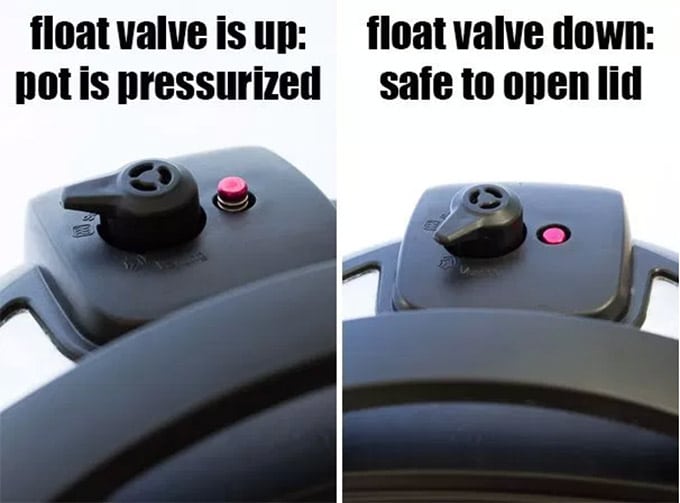
If you wish to open the lid earlier, use a long spoon to turn the steam release handle to venting to force the steam out.
Be careful. The steam will release upwards from the steam release valve. Be prepared for about a minute of heavy steaming.
* To open the pressure cooker lid right away (known as quick release) follow the same steps above to release the steam, but be prepared for a much more forceful burst of steam.
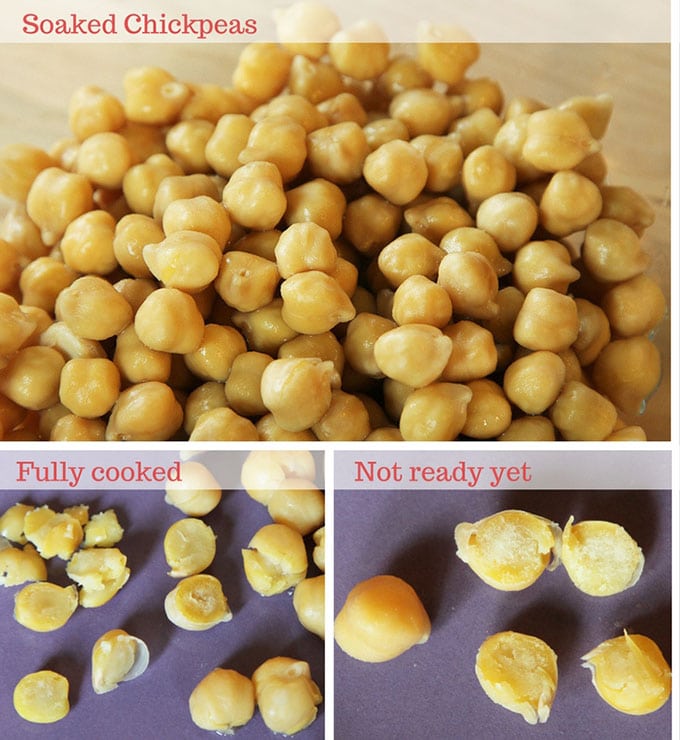
9. Check your beans for doneness
A perfectly cooked bean will be soft and succulent.
There are degrees of softness for sure. As a point of reference, canned beans tend to be on the firmer side.
To know if your bean is fully cooked, cut it in half. The center should be the same color throughout. A visible white chalky center indicates it is not fully cooked.
If you need to cook your beans further, you have two options.
The first is that you can replace the lid of your pressure cooker, bring it back up to pressure for a couple minutes, and then allow the pressure to come down naturally again.
Or, you can continue to cook the beans on the stovetop until they are done.
If you are really concerned about getting a particular amount of doneness (perhaps you want them on the firmer side?) you might decide to reduce the cooking time under high pressure, and finish your beans on the stove.
This way you can carefully monitor them.
10. Complete your recipe
Congratulations! Your beans are perfectly cooked.
You may choose to complete your recipe directly in the pressure cooker pot, or transfer it into a separate saucepan.
If your recipe requires it, add more spices and other ingredients to your beans. This is also when you will usually add more salt to your taste.
After adding seasonings, always simmer the beans for at least 15 minutes more to marry the flavors.
How Do I Cook Beans In A Slow Cooker?
For those of you who enjoy cooking with slow cookers, you’ll be pleased to know that you can cook beans in it too.
Always use the high setting.
Add your beans, a pinch of salt, and any desired seasonings or other ingredients, and cover with 3 inches of water and at least a teaspoon of oil.
Depending on their size, beans can take between 3 to 5 hours to fully cook.
Lentils and split peas will cook in 1 ½ to 2 ½ hours.
Be sure to monitor your beans periodically the first time you make your recipe.
You’ll want to check to make sure that the water doesn’t dry out before the beans are done, or they will cook unevenly.
Bean Storage And Reheating Tips
How Do I Store Cooked Beans?
If you cook extra beans than what you need for your recipe—a likely scenario if you are going to the trouble to cook your beans from scratch—not to worry, as they store well.
Beans will last in the fridge for up to 5 days, or in the freezer for up to 6 months. You can store them in their cooking water, or drain the water off and store just the beans.
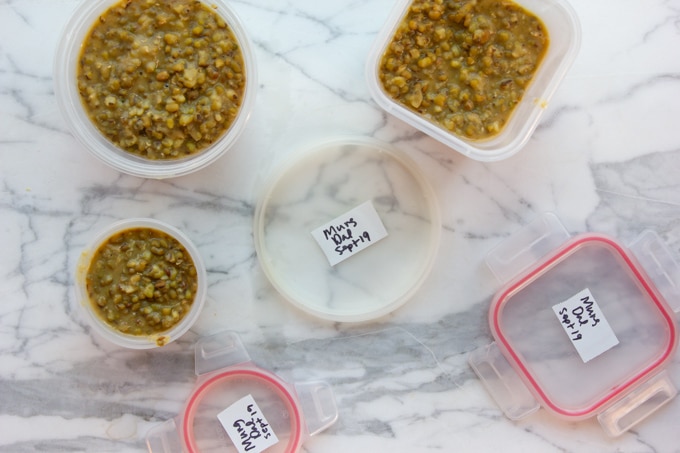
It can be really handy to have cooked beans ready for a rainy-day dinner. Since beans cooked from scratch are so much better than canned beans, you’ll be glad you have them.
Especially if you plan on making a vegetarian dinner, your beans supply the foundational building block for your next healthy meal.
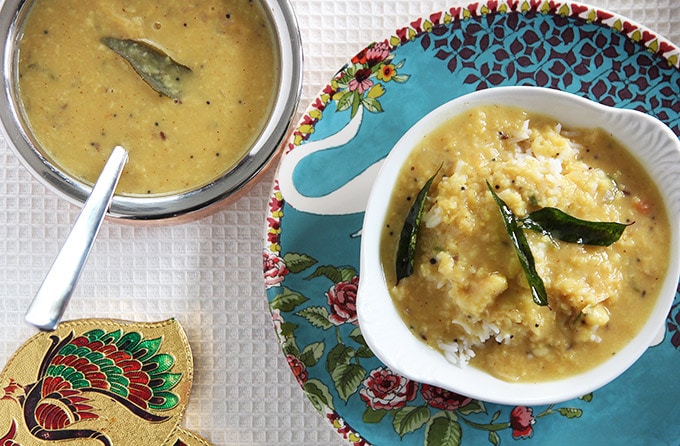
Bean soups, stews, or Indian dal also freeze very well.
Unlike many other foods, beans don’t really change in texture or flavor after being frozen.
How Do I Defrost And Reheat Frozen Beans?
If you have the time, fully defrost your beans in the refrigerator before reheating.
To defrost your beans fast, let thaw at room temperature for about 30 minutes to get them removed from their container.
(If you are in a big rush, run cool water over the container for a few minutes, or pop it in the microwave for a minute if it’s a microwave safe container.)
To reheat beans while still partially frozen, put the lump of frozen beans in a covered saucepan on low heat, along with a quarter cup of water, and cover.
Check the beans periodically and use a wooden spoon to shave off thawed portions of the beans, until fully defrosted and heated. Add more water if necessary.
I always recommend reheating frozen foods really well. Simmering for a few extra minutes counteracts the residual cold in the beans and infuses warmth back into them.
Adding an extra pinch of salt (or other spices) as the beans are reheating can really help to refresh the flavor of the previously frozen beans.
BEAN RECIPES YOU MAY ENJOY
Comforting Yellow Lentils (Dal Tadka)
Black-Eyed Peas Curry With Yogurt Gravy
Savory Chickpeas In Tangy Tomato Glaze (Chana Masala)
Simple Indian Dinner Menu: Dal And Basmati Rice
Introducing Khichdi: India’s (Almost) National Dish
If you liked this post, please share it with your friends on social media, or leave a comment below.
For more Buttered Veg lifestyle content, follow me on Pinterest, Facebook, Instagram, and Twitter.


Leave a Reply